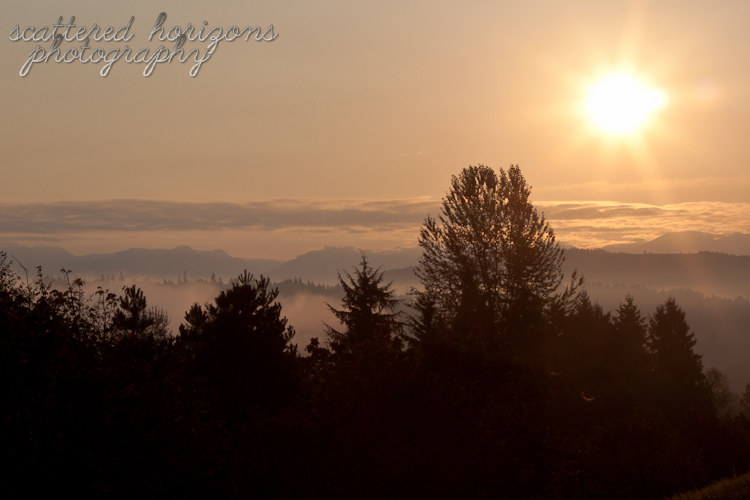
Number of Photos: 30
Locations: Illwaco, WA / Pacific Science Center / Seattle, WA / Commencement Bay, Tacoma, WA / Point Defiance Gardens / Oregon Coast / Sunset Lake / The Cove Normandy Park, WA / Wenatchee, WA / Lake Chelan, WA / Vancouver, WA / Washington Coast / Puyallup Fair / Louisa Boren Park, Seattle, WA / Issaquah, WA
Editing Techniques Used: Lightroom Tips
Tutorials Used: 10 Quick and Easy Lightroom Tricks
What I Learned: Lightroom is even more amazing than I knew it was! The tutorial I used above was filled with a bunch of tricks with features I hadn't used in Lightroom before. My favorites were stacking brushes and the luminance sliders. It opened my eyes to the potential that exists in the program. I can't wait to learn more uses for it as the year continues. I also discovered this month the power of RAW I was not taping into. I have shot RAW for a long time, but when I open them in Lightroom I usually leave the default settings the program puts on the photo. This month I started "zeroing" out the photos and it has allowed me so much more flexibility with my photos. I have been able to save some that I thought were not savable. It has really helped me in my present day editing as well.
Showing posts with label Puyallup Fair. Show all posts
Tuesday, April 30, 2013
Reverse 365: April 2013 Wrap-Up
Labels:
2012,
editing,
fireworks,
flowers,
I Learned,
Lightroom,
manual,
ocean,
Oregon,
Project Reverse 365,
Puyallup Fair,
RAW,
sunset,
T1i,
tutorial,
Washington
Friday, April 26, 2013
Reverse 365: Enthusiastic - Day 116/365 4.26.13
Settings: ISO 100, 50mm, ss1/80, f/11
Date: September 22nd, 2012
Location: Puyallup Fair, Washington
![]() |
| 116/365 - April 26th, 2013 |
"Enthusiasm is not the same as just being excited. One gets excited about going on a roller coaster. One becomes enthusiastic about creating and building a roller coaster." - Bo Bennett
Thursday, April 25, 2013
Reverse 365: Ferris Wheel - Day 115/365 4.25.13
Going to the Puyallup Fair each year is a must here in Western Washington, people take the day off of work and kids miss a day of school. It is a wonderful yearly experience. When I look back at the photos it is very evident how far I have come. I look forward to this September!
Settings: ISO 100, 50mm, ss1/50, f/6.3
Date: September 22nd, 2012
Location: Puyallup Fair, Washington
![]() |
| 115/365 - April 25th, 2013 |
“I see nothing in space as promising as the view from a Ferris wheel.” ― E.B. White
Wednesday, September 26, 2012
Wordless Wednesday: 50mm Lens Journey
Be sure to check out the announcements to the right!
This weekend I decided to use only my 50mm lens to really see what I love about it and what are the limitations. On Saturday I went to the local fair and on Sunday I got up insanely early to watch the sunrise over Seattle. Here are my favorites...
Settings: ISO 100, 50mm, ss1/640, f/20
Puyallup Fair Ferris Wheel, Puyallup, WA
Settings: ISO 100, 50mm, ss1/100, f/11
Sunset at the Puyallup Fair, Puyallup, WA
Settings: ISO 400, 50mm, ss1/30, f/4.0 (should have had a tripod, but I still love it!)
Sunset at the Puyallup Fair, Puyallup, WA

Settings: ISO 400, 50mm, ss1/30, f/4.0 (should have had a tripod, but I still love it!)
Settings: ISO 100, 50mm, ss1/80, f/22
Sunrise over Issaquah, WA
"Experience is the best teacher of all. And for that, there are no guarantees that one will become an artist. Only the journey matters." - Harry Callahan

Labels:
50mm,
goals,
journey,
manual,
Puyallup Fair,
RAW,
sunrise,
Washington,
wordless
Monday, September 24, 2012
Tones on Tuesday #47 9.25.12
I wrote my first tips and tricks post about capturing sunbursts. I would love if you checked it out! You can read it here.
Laurie at Pride in Photos
The light and texture in this photo is beautiful! The detail just pulls you in. Thank you for sharing Laurie!
Kathy at You'll Shoot Your Eye Out
What a lovely shot and a beautiful place! The black and white is soft and the light is lovely. Thank you for linking up Kathy!
Arlene at Crafty Momma
The color and light in this photo is stunning and the fact that it was taken with an iPhone is impressive. Putting this spot on my list of places to visit. Thank you for sharing Arlene!
Brighton at Dear Brighton
This photo has such a lovely dreamy feel. The depth of field is beautiful and the perspective is wonderful. Thank you for linking up Brighton!
Laurie, Kathy, Arlene and Brighton please go HERE to grab your showcase button.
Now it's your turn to share your photo with altered tones. Here are the guidelines for Tones on Tuesday:
- The basic idea is to share one photo where you have altered the tones. Such as a black and white, sepia toned, selective coloring or colored photo. Feel free to share the original and edit, or just the edit.
- Please share a photo that you have taken and edited yourself.
- One photo per photographer please. If you have more than one photo in your post please indicate which one is for Tones on Tuesday.
- Please link up with your permalink and not your blog address.
- Attach the Tones on Tuesday button or a link back here to your post.
- Leave comments for at least 3 other participants, share the love :o)!
- Have fun!
Disclaimer - By participating you give Scattered Horizons permission to share your photo on this blog. Photographers will be given credit for their work.
This weekend I went to the Puyallup Fair, a local tradition. I have been going since I was little and I always enjoy it. I have a few things I have to do when I visit. First, I have to buy a bunch of scones to freeze and enjoy. Yes, they are that good :o)! Second, I have to walk around and photograph the rides. And last I have to see the photography exhibition. This is usually my favorite part of the fair and this year was no different. I love getting inspiration and trying to see techniques and the way a photo was taken. While I was walking around this year I heard someone commenting that viewing the photography is only fun when you know someone who has a picture there. I completely disagree, but that could be my love of photography talking :o)! Next year I hope to enter one of my photos.
I also have to share that in the same building as the photos is a craft section. Set up there was a table with scarves, yarn and knitting needles that invited you to knit a bit and said that the scarves would be donated after the fair. My mom who I went with sat for a while to add a few rows while I was looking at the photographs. How cool is that? I love the fair!
Settings: ISO 100, 50mm, ss1/400, f/11
"It takes an endless amount of history to make even a little tradition." - Henry James
Joining the link ups below. Be sure to check out the beautiful shots and join the Tones on Tuesday link up found further down!
Sunday, September 23, 2012
A First: Sunburst/Starburst Tips and Tricks
So one of my goals I set on New Year's Day was to share some of what I have learned on my blog. If you follow along you know that I am a teacher by trade. Despite this fact, I have felt super hesitant to do any sort of "teaching" on the blog as I find myself feeling unqualified to do so. However, I have been so grateful for all of the people who have put themselves out there to share what they have learned because it has helped me in my photography journey. It only seems right to give back a little and hopefully help someone move forward a step or two on their own journey. So, without further ado here are a few tips and tricks I have learned about shooting sunbursts and starbursts (along with some of my favorite sunburst shots)...
Tips/Tricks (see below for more details)
1. Shoot in RAW
2. Choose a larger aperture number
3. Meter off the sky
4. Take your shot and then change your perspective and repeat!
1. Shoot in RAW - I do this for all of my photos, but with sunbursts especially it makes processing easier.
2. Choose a large number aperture - My go to for getting the best sunburst shape is f/22, but I have gone as low as f/11 or f/16 in certain situations. And one time even as low as f/5.6, but I think that had more to do with the angle of the sun and camera than the aperture. I have also gone higher such as f/25. Usually the higher the number the more defined the sunburst. In some cases this means using a tripod because the aperture is letting in so little light that your shutter needs to be open longer to expose properly.
As I read on a site when I was first researching how to shoot sunbursts, this is similar to when you squint your eyes thereby letting in less light (just as higher aperture numbers do) and the points of light become starburst shapes. And yes I did try this as I was reading and yes it did help me understand shooting starbursts (just in case you find yourself squinting at a light as you read this :o).
3. Meter off the sky - I use spot metering and when I shoot sunbursts I expose (or meter off of) the sky. This can be a little tricky as you are shooting directly into the sun, which can make seeing your light meter difficult. Two things I do about this: 1. Wear sunglasses. Even though this distorts the image color a bit, it helps your eyes not get blinded by the bright sun. And 2. Hold the camera still (or use a tripod) and press down the shutter button halfway so the light meter shows up on your LCD screen and adjust your shutter speed while continuing to hold the camera still.
In many cases when you meter off the sky with the sunlight in the picture it can create an image that is a bit underexposed, but that can be adjusted in post processing.
4. Take your shot and then change your perspective and repeat! Some of my favorite sunburst shots have come from laying on the ground or standing up when I have started in a different position.
Tips/Tricks (see below for more details)
1. Shoot in RAW
2. Choose a larger aperture number
3. Meter off the sky
4. Take your shot and then change your perspective and repeat!
Settings: ISO 200, 29mm, ss1/160, f/25
Quincy Wildlife Recreation Area, Quincy, WA - June 2012
1. Shoot in RAW - I do this for all of my photos, but with sunbursts especially it makes processing easier.
Settings: ISO 200, 18mm, ss1/500, f/18
Washington State Ferry - December 2011
Settings: ISO 200, 18mm, ss1/100, f/22
Birch Bay, WA - April 2012
2. Choose a large number aperture - My go to for getting the best sunburst shape is f/22, but I have gone as low as f/11 or f/16 in certain situations. And one time even as low as f/5.6, but I think that had more to do with the angle of the sun and camera than the aperture. I have also gone higher such as f/25. Usually the higher the number the more defined the sunburst. In some cases this means using a tripod because the aperture is letting in so little light that your shutter needs to be open longer to expose properly.
As I read on a site when I was first researching how to shoot sunbursts, this is similar to when you squint your eyes thereby letting in less light (just as higher aperture numbers do) and the points of light become starburst shapes. And yes I did try this as I was reading and yes it did help me understand shooting starbursts (just in case you find yourself squinting at a light as you read this :o).
Settings: ISO 200, 18mm, ss1/320, f/22
Clark Lake Park, Kent, WA - March 2012
Settings: ISO 100, 50mm, ss1/640, f/20
Puyallup Fair, Puyallup, WA - September 2012
3. Meter off the sky - I use spot metering and when I shoot sunbursts I expose (or meter off of) the sky. This can be a little tricky as you are shooting directly into the sun, which can make seeing your light meter difficult. Two things I do about this: 1. Wear sunglasses. Even though this distorts the image color a bit, it helps your eyes not get blinded by the bright sun. And 2. Hold the camera still (or use a tripod) and press down the shutter button halfway so the light meter shows up on your LCD screen and adjust your shutter speed while continuing to hold the camera still.
In many cases when you meter off the sky with the sunlight in the picture it can create an image that is a bit underexposed, but that can be adjusted in post processing.
Settings: ISO 200, 24mm, ss1/320, f/25
Long Beach, WA - February 2012
4. Take your shot and then change your perspective and repeat! Some of my favorite sunburst shots have come from laying on the ground or standing up when I have started in a different position.
Settings: ISO 400, 55mm, ss1/320, f/5.6
Point Defiance Park Dahlia Test Garden in Tacoma, WA - August 2012
You can also use some of these tricks (shoot in RAW and high aperture number) to capture starbursts (the same as sunbursts, but with lights and not the sun)!
Settings: ISO 400, 50mm, ss13.0sec, f/22
Lewis and Clark Bridge connecting Oregon and Washington
with the Lights of Longview, WA - January 2012
"In learning you will teach, and in teaching you will learn.” - Phil Collins
As a side note, if some or most of this sounds like a foreign language to you (which has been the case for me many times over the course of my photography learning) this post does assume that you are shooting on manual. If you aren't I highly recommend you check out Courtney at Click It Up a Notch's posting on shooting manual mode. It is what got me started and I am so happy I have made the switch to manual!
And of course, if you have any questions please feel free to ask in the comments or through email.
(I would love to know what you thought of my first tips and tricks post! Feedback is always welcome! :o).
Thursday, September 22, 2011
Before and After: Ferris Wheel 09.17.11
I came down with a cold or something yesterday. I am not feeling too hot today, but editing this photo made me feel a bit better :o). I took this at the Puyallup Fair on Saturday. I have seen so many gorgeous ferris wheel shots lately that I just had to try my hand at it as well. It was a rainy day and I was sad that the sky behind the ferris wheel was so drab. In my edit I decided to play with the tones using Pioneer Woman's actions. I think I have tones on the brain from Tones on Tuesday, my first link up I am hosting. I like the old photo feel. Thoughts and critiques are always welcome!
Still time to link up a photo with altered tones in Tones on Tuesday:
Before
Taken with Canon EOS Rebel Ti1
Settings: ISO 200, 55mm, ss1/200, f/5.6 (full manual)
After
Edited with Adobe Photoshop
Used Pioneer Woman's Vintage and Lovely and Ethereal Actions
"You have brains in your head. You have feet in your shoes. You can steer yourself in any direction you choose. You're on your own, and you know what you know. And you are the guy who'll decide where to go." - Dr. Seuss
Linking up with Pixel Perfect Blog Hop. Head over and see the other before and afters!
Labels:
actions,
Before and After,
creative edit,
editing,
manual,
Photoshop,
Puyallup Fair,
RAW,
Tones on Tuesday,
Washington
Location:
Puyallup, WA, USA
Wednesday, September 21, 2011
I Learned: Wild Cat Rollercoaster 09.17.11
This week I learned that sometimes meeting my goal of posting a photo a day is difficult. Especially when I start a new link up. Yesterday I decided to start a link up called Tones on Tuesday, a chance to show off your photos where you altered the tones - black and white photos, sepia toned photos, etc. I ran into some problems with coding and images and my computer was not cooperating. Add to that getting home late from work and not feeling well. It was stressful to say the least. I stuck with it though and was able to get it up and running. I am afraid that the late posting may result in less link ups, but you live and learn for next time :o).
Ooh, I also learned I love Pioneer Woman's actions! Here is my photo from Tones on Tuesday just with a different tone. I used PW's Old West Action. If you have a picture with altered tones I would love it if you linked up with Tones on Tuesday here.
Thanks for reading! Critiques are welcome!
Settings: ISO 200, 32mm, ss1/200, f/6.3
“I'm always mentally photographing everything as practice.” - Minor White
Linking up with Click it Up a Notch for I Learned. Be sure to check out what others have learned this week!

Ooh, I also learned I love Pioneer Woman's actions! Here is my photo from Tones on Tuesday just with a different tone. I used PW's Old West Action. If you have a picture with altered tones I would love it if you linked up with Tones on Tuesday here.
Thanks for reading! Critiques are welcome!
Settings: ISO 200, 32mm, ss1/200, f/6.3
“I'm always mentally photographing everything as practice.” - Minor White
Linking up with Click it Up a Notch for I Learned. Be sure to check out what others have learned this week!

Labels:
actions,
Click it Up a Notch,
creative edit,
editing,
I Learned,
manual,
Puyallup Fair,
RAW,
Tones on Tuesday,
Washington
Location:
Puyallup, WA, USA
Monday, September 19, 2011
Sky Diver Fair Ride 09.17.11
On Saturday my mom and I went to the Puyallup Fair, a Western Washington staple. We had scones, the signature fair food, and rode the Sky Ride for the first time. Then we did my favorite fair activity, looking at the photographs. I have always loved looking, but this year I saw everything through a new perspective. I wondered what aperture they used, if they used a tripod, if they shot manual, what the photos would have looked like cropped a little tighter. I had a new appreciation for how the moments were captured and I was awed by so many images. This was also the first year I thought that maybe, just maybe, I could enter a photo of my own next year. In the past I never thought I was good enough, but what I am beginning to realize through this journey and connecting with other photographers is that the beauty of an image is not necessarily directly related to how much technical knowledge you have. It is so much more than that.
This photo was taken after riding the Sky Ride, which gives you an aerial view of the fair. It is of a Sky Diver ride that I was drawn to because of the purple lights. It was just beginning to rain and the sky was a bland gray. In post processing I wanted to give some interest to the sky so I played with the basic settings and then ran Pioneer Woman's Fresh and Colorful, Lovely and Ethereal and Boost actions. I would love some thoughts on how it turned out or suggestions on how to add interest to the sky in another way. Thank you for stopping by and for teaching me so much about photography!
Settings: ISO 200, 39mm, ss1/80, f/6.3
"If you obey all the rules you miss all the fun." - Katharine HepburnLinking up with The Creative Exchange. Be sure to take a look at the other fabulous photos!

Labels:
actions,
colors,
creative edit,
Creative Exchange,
editing,
family,
manual,
Photoshop,
Puyallup Fair,
RAW,
Washington
Location:
Puyallup, WA, USA
Subscribe to:
Posts (Atom)